
Service
Complete Guide To Installing A Ductless Mini-Split Air Conditioner

Ductless mini-split systems offer efficient heating and cooling using advanced heat pump technology, eliminating the need for traditional ductwork. Ideal for rooms like bedrooms, home offices, and garages, these systems are a cost-effective alternative to conventional HVAC units. Whether you’re looking to install a cooling-only system or a full mini-split AC unit, this comprehensive guide will walk you through the installation process step by step.
nnnnSafety Note: Installing ductless mini-split systems involves working with refrigerant lines and high-voltage electrical connections. In some states, licensed professionals are required to perform these HVAC services. Verify with your local code official to ensure compliance with necessary licensing and permit regulations. Additionally, installation instructions may vary based on the manufacturer, so always refer to the manual provided with your specific unit for detailed wiring instructions.
nnnnStep 1: Select The Perfect Mini-Split System
nnnn
Embarking on a DIY mini split installation involves strategically positioning a condensing unit outside your home, arranging an air handler inside, connecting refrigerant lines, and ensuring proper electrical wiring. Although most ductless mini split systems necessitate professional installation due to the complexities of handling refrigerant lines, a partial DIY approach is feasible—this entails setting up the air handler and condenser unit personally and enlisting a professional solely for refrigerant line setup.
nnnnAs an alternative, DIY mini splits come pre-charged with refrigerant, eliminating the need for professional intervention in this regard. Crafted to regulate the temperature within a single room rather than across a vast expanse, these DIY ductless mini split systems offer a convenient cooling and heating solution. Scroll through this comprehensive guide to familiarize yourself with the installation process for a ductless mini split system within your residential or commercial space.
nnnnPrior to initiating installation procedures, selecting a mini split system tailored to your specific needs is imperative. Here are the options at your disposal:
nnnn- n
- Single-zone ductless mini splits: These units cater to heating or cooling a single area, such as a kitchen, bedroom, addition, attic, or garage, and are characterized by a singular air handler and condenser unit, making them the easiest to install. nnnn
- Dual-zone ductless mini splits: Designed for regulating the temperature of two distinct areas, these units boast two air handlers powered by a shared condenser unit, perfect for maintaining consistent temperatures across various rooms in a home. nnnn
- Multi-zone ductless mini splits: Intended for different zones, these units possess a condenser unit capable of accommodating multiple air handlers. Note that the installation of these systems may entail additional complexity, necessitating adherence to manufacturer guidelines when installing multi-zone mini split heat pumps. n
Furthermore, determining the appropriate size of the mini split for your space, informed by the system’s British Thermal Unit (BTU) output, is crucial. Opt for a 2-ton mini split or a 4-ton mini split system, which are commonplace options capable of facilitating effective temperature regulation in spaces of varying sizes. Prior to purchase, thoroughly measure your area and perform square footage assessments to ensure selecting a well-fitted mini split that meets the BTU requirements of the space, with manufacturers offering sizing recommendations in their product manuals.
nnnnStep 2: Placement of The Indoor Unit
nnnn
Select a suitable wall within the room that requires heating and/or cooling and connects to the exterior. Identify an unobstructed space on the wall large enough to accommodate the air handler, ensuring it is at least six feet above the floor. Avoid installing the unit in direct sunlight or near heat sources to maintain its efficiency. Adhere to the manufacturer’s recommended clearance between the air handler and the ceiling. Opt for a wall without obstructions outside, considering you will run refrigerant lines between the indoor and outdoor units through this wall.
nnnnLocate the studs in the wall and mount the plate directly onto them. Ensure alignment with the typical stud layout and plan for the drilling of a hole to the outside. Utilize a stud finder to identify any hidden objects and obstructions behind the wall.
nnnnPosition the bracket for the wall unit securely and levelly, marking the mounting holes on the wall with precision. Drill pilot holes of a suitable size and consider using wall anchors if necessary. Drill a hole for the refrigerant lines, drain tubing, and control wires, taking note of the manufacturer’s guidelines.
nnnnDrill a downward-angled hole through the exterior wall after marking and pilot drilling, ensuring proper drainage. Connect the control wire to the indoor unit according to the specific model’s instructions.
nnnnThread the refrigerant pipe, control wire, and drainage tubing through the hole in the wall, securing them together with electrical tape. Lift the indoor unit onto the wall mount and feed the bundled components through the hole. Fasten the indoor unit onto the mount using the provided hardware.
nnnnStep 3: Mounting the Outdoor Unit
nnnn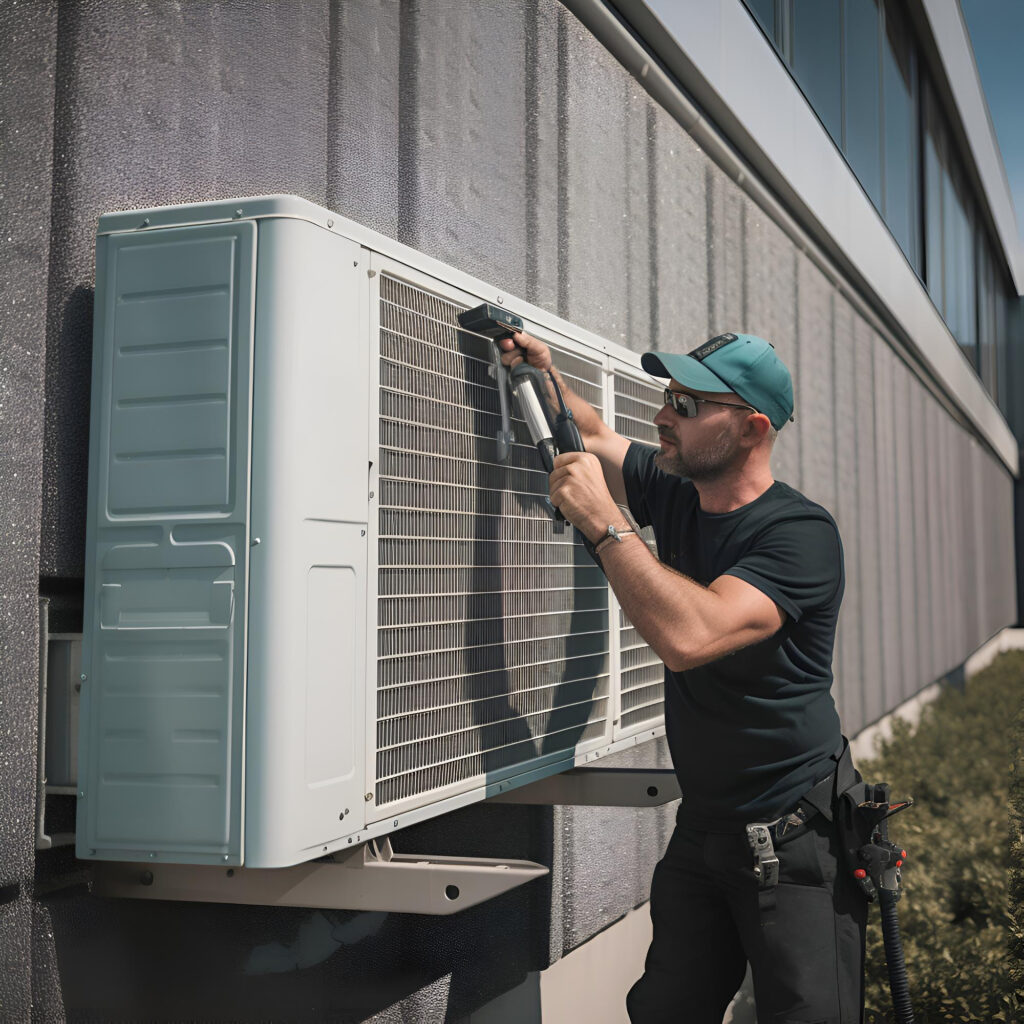
When selecting the prime location for your outdoor unit, consider various options such as placement on the ground, on the rooftop, or on an exterior wall with specialized mounting fixtures. Should you choose ground-level positioning, ensure that the unit is firmly anchored onto a concrete pad—either custom-made or acquired for this specific purpose.
nnnnAfter securely affixing the condenser, establish the connection between the indoor and outdoor units by linking the pipes and tubing, particularly if utilizing pre-charged lines in a DIY installation kit. Extreme caution must be exercised, avoiding any cutting of pre-charged lines due to the potential hazards of releasing refrigerant into the environment, which can cause serious skin injuries. Adhering to model-specific guidelines, carefully fasten these connections utilizing an adjustable wrench and torque wrench as necessary. In cases where the installation kit necessitates cutting and charging of lines, it is advisable to engage a professional technician for this critical task.
nnnnTo maintain a tidy presentation and ensure stability, secure the wires and tubing along the exterior wall, utilizing appropriate covers. Proceed by attaching the suitable pipe joint to the line set at the rear of the outdoor unit, followed by linking the multi-conductor wiring extending between the indoor and outdoor units. Completing these connections may require the meticulous use of a torque wrench to guarantee precision.
nnnnStep 4: Engage A Professional For Follow-Up
nnnn
Once you have successfully connected the indoor and outdoor units, we strongly recommend bringing in a professional A/C and heating specialist to manage the remainder of the task. This expert will ensure that your connections are secure and handle any potentially risky dry nitrogen and refrigerant aspects.
nnnnIt is also essential to hire a licensed electrician to provide power to the unit. This phase of the project includes routing a 220-volt (or sometimes 120-volt) line from the breaker panel to a disconnect switch, and then from the switch to the unit.
nnnnThe installation of a mini-split system can present challenges. Proceed with caution and patience, even if you have prior experience. Additionally, contemplate the installation of a wall-mounted ductless air conditioner for cooling smaller spaces. Should you require support, especially for the installation of a mini-split heat pump, consider utilizing our mini-split installation services for assistance.
n
A lot of business owners think their website isn’t working.
But most of the time, it’s not that the website is broken.
It’s that the website is confusing.
Confusion doesn’t create leads.
Confusion creates hesitation.
And hesitation creates the most expensive action in marketing:
The back button.
So today we’re going to talk about the real reason people don’t convert…
and how Fenway Web fixes it.
The Truth: People Don’t Read Websites—They Scan
Nobody lands on your homepage and reads like it’s a novel.
They scan.
They look for:
- what you do
- if you’re legit
- how much it costs (or at least a range)
- whether you serve their area
- whether you can help their problem
- what they should do next
If they don’t find answers fast…
they leave.
Not because they hate you.
Because their brain says:
“Too much work.”
The 5-Second Test (Fenway Web Standard)
Here’s the test we run on websites:
Can a stranger answer these in 5 seconds?
- What do you do?
- Who do you do it for?
- Where do you do it?
- Why should I trust you?
- What should I do next?
If the answer isn’t obvious?
Your website is confusing.
The Most Common “Confusion Mistakes” We See
Mistake #1: Trying to Sound Fancy
Big words don’t build trust.
Clear words build trust.
 “Innovative solutions for modern environments”
 “We install ductless mini-splits in Myrtle Beach.”
Simple wins.
Mistake #2: Hiding the Offer
If your visitor doesn’t understand:
- what you sell
- what it includes
- what it costs (roughly)
- what the next step is
They won’t act.
Your offer has to be visible.
Not buried.
Mistake #3: Too Many Options
Choice overload kills conversion.
If your menu has 19 items…
Your visitor gets overwhelmed.
They shouldn’t have to “figure out” where to click.
Your website should guide them.
Mistake #4: Weak Calls-to-Action
“Learn more” is lazy.
“Contact us” is vague.
A call-to-action should feel like progress.
Better CTAs:
- Get a Free Quote
- Check Availability
- Book an Estimate
- Request Pricing
- Call Now
Your CTA must remove hesitation.
Mistake #5: The Homepage Doesn’t Do Its Job
A homepage isn’t a collage.
It’s a sales page.
If it doesn’t include:
- clarity headline
- proof stack
- services
- process
- FAQs
- next step
It’s not doing its job.
The Fenway Web Fix: Clarity Blocks (The Conversion Blueprint)
When Fenway Web rebuilds a confusing site, we install a structure we call:
Clarity Blocks
These are sections that eliminate uncertainty fast.
Every high-performing service website needs:
1) The Clarity Headline
“We do X for Y in Z.”
2) The Offer Summary
What you do + packages + what’s included.
3) The Proof Stack
Photos, reviews, numbers, trust badges.
4) The Process
Step 1, Step 2, Step 3.
5) FAQs
Answer the fears.
6) The CTA
Book / call / quote.
This structure works across any industry.
Because it matches how humans think.
A Confusing Website Is an Expensive Website
Here’s the part business owners don’t see:
Even if you’re paying $0 for ads…
Confusion costs you money.
Because you’re losing:
- leads
- calls
- bookings
- trust
And many of those visitors were perfect buyers.
They just weren’t confident.
Final Word: Clarity Converts
You don’t need more traffic.
You don’t need more followers.
You don’t need a new logo.
You need clarity.
Clarity makes the customer feel safe.
And when they feel safe…
They take action.
Want Fenway Web To Fix Your Website Confusion?
Fenway Web can audit your site and show you:
- what’s confusing visitors
- what’s stopping conversions
- and how to fix it fast
Because the best websites don’t impress people.
They guide people.
The post Your Website Isn’t Broken—It’s Confusing (And That’s Why Leads Don’t Convert) appeared first on Fenway Web.
Most websites don’t fail on design.
They fail on launch.
Because going live isn’t just “publishing.”
It’s:
- DNS changes
- hosting configuration
- SSL certificates
- redirects
- caching
- analytics
- performance checks
- SEO indexing setup
- form delivery checks
- broken link scans
And if you skip any of those…
You can accidentally launch a website that looks great…
…but silently breaks:
- calls
- forms
- rankings
- tracking
- emails
- customer trust
So today, Fenway Web is pulling the curtain back.
This is our Go-Live Standard — the checklist we follow to launch websites cleanly, safely, and professionally.
Why Most Website Launches Go Sideways
The average launch looks like this:
website is built owner is excited button gets clicked someone notices forms aren’t working pages load slow Google loses rankings tracking is wrong old links break customers see errors
A bad launch doesn’t always look bad immediately.
It looks fine…
then your leads dry up 2 weeks later.
That’s why a real launch process matters.
The Fenway Web Go-Live Standard (47-Point Checklist)
This is what Fenway Web checks before we call a website “live.”
CATEGORY 1: Domain + DNS (Points 1–7)
- Confirm domain ownership + login access
- Verify DNS records (A / CNAME / TXT)
- Confirm TTL strategy before changes
- Verify WWW vs non-WWW canonical behavior
- Confirm email records (MX) are untouched
- Confirm CDN records (if used)
- Confirm propagation + fallback plan
CATEGORY 2: SSL + Security (Points 8–13)
- SSL certificate installed + auto-renew enabled
- HTTP → HTTPS redirect working sitewide
- Mixed content scan (no insecure assets)
- WordPress admin hardening (if WP)
- Firewall/WAF enabled if applicable
- Security headers baseline check
CATEGORY 3: Redirects + URL Integrity (Points 14–20)
- Map old URLs to new URLs
- Install 301 redirects for high-value pages
- Prevent redirect chains
- Prevent redirect loops
- Verify canonical tags on main pages
- Check 404 errors (pre-launch scan)
- Verify permalink structure consistency
CATEGORY 4: SEO Launch Setup (Points 21–27)
- Meta titles and descriptions complete
- H1 structure correct on key pages
- XML sitemap generated + accessible
- Robots.txt verified (not blocking important pages)
- Submit sitemap to Google Search Console
- Verify schema opportunities (LocalBusiness, FAQ, etc.)
- Confirm noindex removed from launch pages
CATEGORY 5: Performance + Speed (Points 28–33)
- Image compression check
- Cache plugin / caching enabled (if WP)
- Minification settings reviewed
- Lazy load behavior tested
- Mobile performance spot test
- Run Lighthouse baseline test + record score
CATEGORY 6: Forms + Lead Delivery (Points 34–38)
- Test every form submission
- Confirm email delivery (not just thank-you message)
- Confirm spam filtering works
- Confirm form submits tracked as conversions
- Confirm phone number links work (click-to-call)
CATEGORY 7: Analytics + Tracking (Points 39–44)
- GA4 installed and firing
- Google Search Console verified
- Meta Pixel / Ads tags (if used) installed properly
- Event tracking for conversions (calls/forms/bookings)
- Confirm UTM tracking consistency
- Confirm cookie banner behavior (if enabled)
CATEGORY 8: UX + Human QA (Points 45–47)
- Full mobile navigation check (menu, tap targets)
- Full cross-browser check (Chrome/Safari/Edge)
- Proofread the “money pages” (home/services/contact)
The Real Goal: A Quiet Launch
A successful launch is boring.
No panic.
No emergency fixes.
No “why isn’t it working?”
Just: clean performance clean SEO transfer clean conversion tracking clean user experience
A quiet launch is a professional launch.
Final Word: Launch Day Is Not the Finish Line
Going live is not “done.”
It’s the starting line.
Because after launch, we monitor:
- uptime
- speed
- lead delivery
- indexing
- ranking movement
- performance drift
That’s the Fenway Web standard.
Not just build.
Not just publish.
Build → verify → launch → monitor.
Want Fenway Web To Launch It The Right Way?
If you’re planning a new site launch (or relaunch), Fenway Web can handle:
design + build SEO structure speed optimization conversion tracking safe Go-Live process monitoring support
No chaos.
No broken leads.
No lost rankings.
The post The 47-Point Website Launch Checklist (How Fenway Web Goes Live Without Breaking Things) appeared first on Fenway Web.
Let’s talk about the problem nobody wants to admit:
Your website might be working…
…but your business might be missing the leads.
Because for most service businesses, the #1 conversion event isn’t a form.
It’s a phone call.
And if that call goes unanswered?
That lead doesn’t “wait.”
They don’t sit there and think:
“Hmm… I’ll try again later.”
They do what humans do in 2026:
tap back tap competitor book with whoever picks up
That’s it.
No hate.
No drama.
Just reality.
The Hard Truth About Lead Generation
Most businesses assume this:
“We need more traffic.”
But traffic isn’t the main problem.
The main problem is capture.
If your site generates 15 leads this week but you miss 7 calls…
Your website didn’t fail.
Your system failed.
Here’s What Missed Calls Actually Cost You
Let’s do simple math.
If:
- your average job is $750
- you miss 5 calls per week
- and only 2 of those would have booked
That’s:
$1,500/week lost
$6,000/month lost
$72,000/year lost
That’s not “marketing.”
That’s a leak.
And most businesses don’t even know it’s happening.
Why People Call Instead of Filling Out Forms
Customers call because:
- they want fast answers
- they want to feel you’re real
- they need reassurance
- they want pricing clarity
- they’re in a hurry
- they’re anxious
Phone calls are trust checks.
When someone calls, they’re basically asking:
“Are you legit? Are you available? Can you help me?”
If you don’t answer…
They assume:
“They’re not serious.”
The Real Problem: Websites Generate Leads Faster Than Businesses Respond
Modern websites are fast.
But a lot of businesses are still running like it’s 2011.
- one phone
- no call routing
- no backups
- voicemail full
- no text option
- no scheduling link
- no automatic follow-up
So even if your website performs…
your lead pipeline collapses.
The Fenway Web Fix: Build a Lead-Catching System (Not Just a Website)
At Fenway Web, we build websites that generate leads…
…but we also build the infrastructure to catch them.
Because leads don’t matter unless you capture them.
7 Ways to Stop Missing Leads (Fast)
Here’s what we recommend for every service business.
1) Track Missed Calls (This Is Non-Negotiable)
If you don’t track missed calls, you’re operating blind.
You need to know:
- how many calls came in
- when they came in
- how many were answered
- how many were missed
- which source generated them
Missed calls are measurable — and fixable.
2) Add “Text Us” as a Conversion Option
People love texting.
Especially younger customers.
Add: click-to-text “Text Us Now” button “Text for quick quote”
Text turns missed calls into saved leads.
3) Add Scheduling Links
Some customers don’t want to talk.
They just want to book.
Add: “Book Estimate” “Schedule Inspection” “Pick Your Time”
Scheduling links are lead catchers.
4) Add “Call Now” Buttons That Follow the User
On mobile, your CTA should stay visible.
Floating call button = more calls.
More calls = more jobs.
5) Add After-Hours Capture
Service businesses get leads at weird hours.
If a customer visits at 10:30 PM, you need:
“Request callback” form “Emergency?” routing “Leave a message + auto text reply” system
Because leads don’t respect business hours.
6) Build a Rapid Response Rule
This is the gold standard:
Respond within 5 minutes.
Even 15 minutes makes a difference.
If you can’t answer live:
- call back instantly
- send a text instantly
- follow up consistently
Speed wins leads.
7) Install a Backup Answer System
If you’re a 1-2 person team, you can’t answer every call.
So you need one of these:
- call forwarding
- call answering service
- receptionist tool
- second line
- voicemail-to-text + instant follow-up
Because missing calls is the same as turning customers away at the door.
The Website Mistake: Hiding the Phone Number
This one drives us crazy.
A service business website that hides the phone number is like a store that hides the front door.
Your phone should be: in the header in the sticky menu in the footer on every service page in the CTA blocks
Because for service businesses:
Phone = Revenue.
Final Word: Leads Don’t Get “Lost”—They Get Taken
That’s the truth.
If you don’t catch the lead…
someone else will.
And in most markets, that “someone else” isn’t better than you.
They just answer the phone.
So before you blame your website…
Make sure your business is catching what it’s generating.
Want Fenway Web to Fix Your Lead Capture?
If your website gets traffic but leads feel inconsistent, Fenway Web can:
upgrade your conversion system improve call-to-action layout add text & scheduling install tracking build your “lead catching” infrastructure
Because leads don’t just need to be generated…
They need to be captured.
The post Missed Calls = Missed Money (And Your Website Can’t Fix That Alone) appeared first on Fenway Web.


Boston Made Expands Creative Content with New “Bands” Music Video Series

Boston Made Introduces Music Videos

Looking Ahead to the Future

Boston Made, Inc. Heats Up the Fashion Industry with Island Heat
Boston Made Introduces Music Videos

Building Something Bigger: The Future of Boston Made Pets Is Under Construction
-
 Service2 years ago
Boston Made, Inc. Heats Up the Fashion Industry with Island Heat
-
 Videos1 week ago
Boston Made Introduces Music Videos
-
 E-Commerce8 months ago
Building Something Bigger: The Future of Boston Made Pets Is Under Construction
-

 E-Commerce9 years ago
Boston Made Launches Online Tech Store
-
 Videos2 days ago
Boston Made Expands Creative Content with New “Bands” Music Video Series
-

 E-Commerce9 years ago
How to understand your employees and keep them happy
-
Service2 years ago
The Ultimate Guide to Ductless Air Conditioning: A Comprehensive Solution for Efficient Home Cooling
-

 Service2 years ago
Bolutpat vestibulum interdum tempor congue tempus aene accumsan proin.